


3.3.21
LAB 6 - SERIAL GAME/AUDIO CONTROLLER
Assignment: In this lab, you will create an interactive application in P5.JS and use serial communication to send values between your Arduino and your application*. This lab spans 2 weeks, with the first part due on 03/03 and the second part due on 03/10. It is posted here in full, so you can work ahead if you prefer to do so.
Part 1: Create an interactive P5.JS Sketch (due March 3)
Objectives:
-
Learn how to create an interactive sketch in P5.JS
For this first part, I created a city scene. My static image is the city during the day. For my dynamic image, I used map() to make the background color change to a sunset color based on mouse position. The red and blue values vary based on the x position and the y position controls the green value. If you click the mouse in the dynamic image, the background becomes dark blue, a moon appears in the sky, and stars randomly shoot across the sky. The high up the mouse is, the slower the stars move, and the lower it is, the faster they move (also used map()).
Static Image:
Dynamic Image:
Part 2: P5.JS ⟷ Arduino Serial Communication (Due March 10)
In this part, I will connect a P5.JS scene to the Arduino.
Step 1: Gather Materials
-
Joystick
-
Female to male wires (4)
-
Arduino UNO
-
USB Cable
Step 2: Set up Circuit
For my circuit, I connected the black wire to ground, the red wire to 5V, the white wire from VRx to input A0, and the blue wire from VRy to input A1. A schematic and picture of my circuit can be seen below:


Step 3: Write Arduino Code
For my code, I set my variables XValue and YValue to the inputs A0 and A1 and for it to collect data on the position the joystick is in.
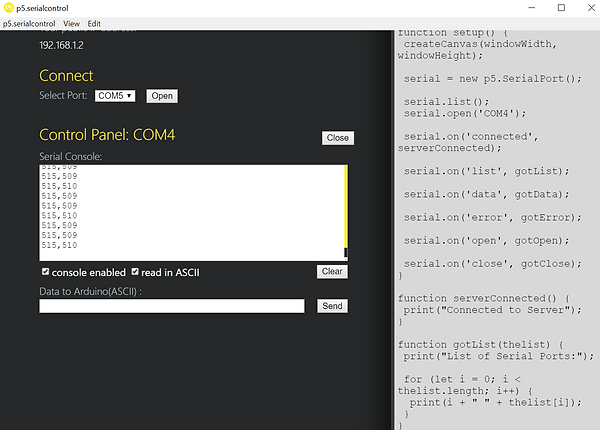
Step 4: Connect to p5 Serial Control
After uploading my code, I opened the p5 serial control and connected to COM4. I made sure to enable the console and read in ASCII values. The numbers seen in the console are what I asked it to print: X, Y
Step 5: Write p5 Code
I edited the file provided in class to implement my city scene. The element I chose to be affected by the joystick's position is the sun. I made it so the user can control the sun and make it look like it's setting with the joystick. My P5 code can be found below: