


3.28.22
WEEK 11 PROGRESS
1. What were your goals for this week?
-
Finish bioplastic necklace
-
Decorate head that holds bioplastic accessories
-
Finalize display
-
Add tags to the items
-
Finish QR codes and posts
-
Redo marker for flower so it blends in
2. What did you accomplish, please reflect on your time management. What worked or didn't?
I accomplished everything on my goal list this week. Essentially it was everything I needed to do to finalise my project and get it ready for demos.
3. How did you integrate feedback?
I integrated feedback from you (Sheiva) regarding the stands for the QR codes. I kept the clear stands I bought from Macy's but to elevate them more, I made three tripods from wooden dowels. I painted them black and then flipped the clear stand upside down so it would rest on the tripod. Another way I integrated feedback was with my stats. I condensed them as much as I could so that the information could be easily digested.
4. What was unexpected / what lessons did you learn?
Something that I learned was that QR codes need to be black or a very dark color to work. I had a pink, yellow, and blue QR code but they would only work sometimes. The acrylic caused a glare and in addition to the colors being lighter, it would only read some of the time which was a problem. I didn't want to use black QR codes, but in the end this was the right decision to avoid any problems.
Bioplastic Necklace
For the bioplastic necklace, I used the same bioplastic recipe as I did for the earrings. For the coloring, I decided to use natural dyes (beets, blue spirulina, and turmeric). The necklace ended up turning out well, but when dried, the pieces became hollow which was unexpected. This made the necklace very fragile, so I tried again teo more times and the same thing happened. I think this is due to the fact that the mould is so small compared to the moon and stars and that bioplastic shrinks away. Here's are a photo of how it turned out! I used a safety pin to attach the two links so I can easily take it on and off of the display.

Finish QR Codes and Posts
As I mentioned in the unexpected things I learned, I ended up having to have black QR codes instead of colored ones. To elevate them, I made tripods from square dowels I got from home depot then painted them black. This was the most cost effective way to display them.
I originally wanted to glue them right side up, and have the instructions on the front bottom of the acrylic stand. However, this ended up being very precarious and would most likely break if someone bumped into it. Instead, I discovered I could have th acrylic stand upside down and put the instructions on the bottom of it so they are facing up.


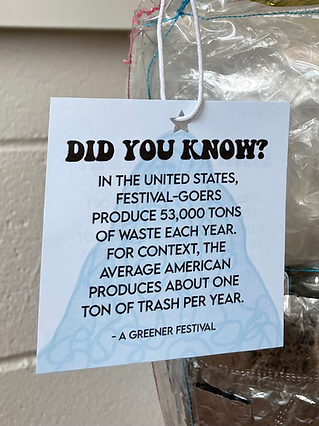
Add Tags to the Items
Something I was still trying to figure out was how I could display the statistics without distracting from the items. I decided to add tags like clothing companies have on my items. On one side, I have the statistic and on the other side I put a list of materials to be fully transparent about where I sourced items and how these pieces are sustainable. One mistake I see is that I spelled turmeric wrong, so I plan on reprinting the bioplastic one. I also want to expand the description for the accessories to match the other two.
On demo day I would like to get feedback on these...
1) Do the designs make sense/should I change them so they are simpler?
2) Should I include a total cost for the items?


Finalize Display
Here are videos and images of each of my items in their final state.
Overalls
These overalls to represent the amount of clothing from fast fashion companies that is thrown away and burned or landfilled because it was left behind. They are made from fabric remnants. These remnants would have been thrown away if they were not donated to Art Parts to resell. The hardware was also purchased from Art Parts. The final cost of the overalls was $16.58.
- Hardware (2 buckles, 2 button pins, 2 clasps) = $2.00
- Fabric Remnants = $6.30
- Pattern from Etsy = $8.28
The top video shows how everything works with the QR code and maker and the bottom video is a general overview of the set up.

Puffer Vest
The puffer vest represents the amount of waste created at festivals. It is made from soft low-density polyethylene (LDPE) plastics which are not recyclable. These plastics are a common plastic found at festivals which is why I decided to use them to fill the jacket. The plastics are from myself, friends/family, and some I collected when I attended Audiotistic, a music festival that happened back in November 2021. The plastic vinyl was donated to me by my friend Mandi Wilner, who used it in a project she did last semester and these were the leftovers. The final cost of the vest was around $3.50.
- Heavy-duty thread (Joann's) = $3.00
- Zipper (Art Parts) = $0.50
The top video shows how everything works with the QR code and maker and the bottom video is a general overview of the set up.

Bioplastic Accessories
These bioplastic accessories represent the amount of accessories that get discarded. They are made from bioplastic which is biodegradable. I found the recipe from The Bioplastic Cookbook and this article. I had many of these items from the last time I made bioplastic, so the cost for me was less than if you were to buy everything from scratch. The final cost of all materials was $35.40.
- Moon and star earring mould = $5.99
- Necklace chain mould = $6.29
- Beet = $0.60
- Turmeric (already had) = $4.19
- Blue Spirulina (already had) = $12.95
- Glycerol (already had)= $2.99
- Unflavored Gelatin (already had) = $2.39
- Water = $0.00
The top video shows how everything works with the QR code and maker and the bottom video is a general overview of the set up.
